Your first mission (part 1)
In this tutorial I will teach you how to edit a map so much to create your own mission.
Well we start off in your Hidden and Dangerous Deluxe 'missions' directory. I want you to create your own addon mission directory then name it 'Airfield 1944'. If you read 'Setting up directories' you'd know how to create a addon mission directory, if you do not read it now. You also must have read 'Introduction to the editor' otherwise you will have a lot of trouble with this tutorial.
So you have your 'Airfield 1944' directory done? Good. Go into the 'poland1' mission directory and copy the 'game' folder then paste it in your own mission directory replacing the 'game' folder you created.
Now for something new, go into the 'text.mod' folder in your addon mission directory. Create a text document and re-name it to 'addon.txt'. Now set it out like I have in the picture below.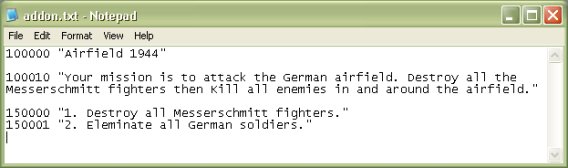
Let me explain what all that is for. The top part is your mission name. This is used when in the game menu and you highlight the mission. 100000 to 100005 are the addon mission name codes. You must put the code then the mission name in brackets. The second part is the mission description. This is also used in the game menu when a mission is selected. 100010 to 100015 are the mission description codes. Again you must write the code then the mission description in brackets. Finally the third part is the mission objectives. These are used in the game at the start of the mission and whenever you complete an objective. 150000 to 199999 are the mission objective codes. Once again you must write the code then the mission objective in brackets. Also after you have written all three parts you must have a space to the next line or in the game an error will appear. Look at the picture above and you will see I have done this.
Alright with that out of the way we can now start up the editor. Open up the 'Airfield 1944' mission and you should get something like the screenshot below.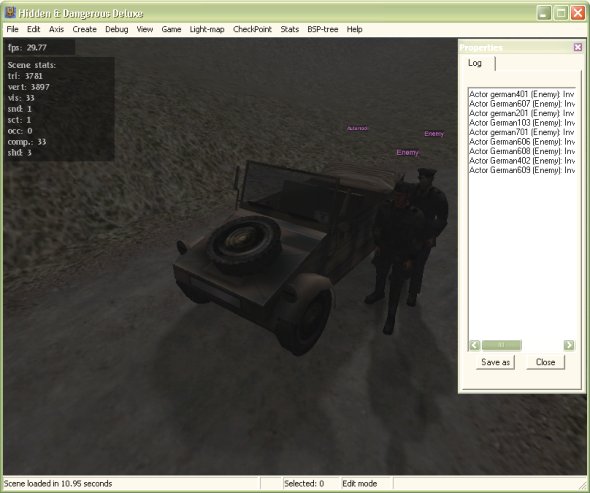
Hrmmm, look at that we seem to have errors and we haven't done anything yet. Don't worry about this error. I know what it is for but it's pointless explaining so just ignore it.
Go to Edit > Select by name or just press 'n' for short and you should get what's below on your screen.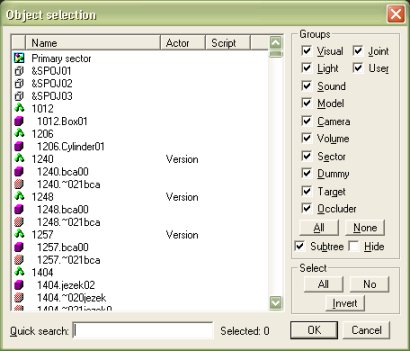
This is the object selection screen and this come in handy for deleting large amounts of objects and finding things. Look on the side of the little box can you see where it says 'groups', it has all the little boxes ticked. Under all the boxes with ticks it has 'all' and 'none' this means select all or select none. Click 'none' so all the boxes have no ticks. You'll also notice that there is nothing in the menu. On the 'groups' find 'model' and tick it. All the models will now appear in the menu screen like in the picture below.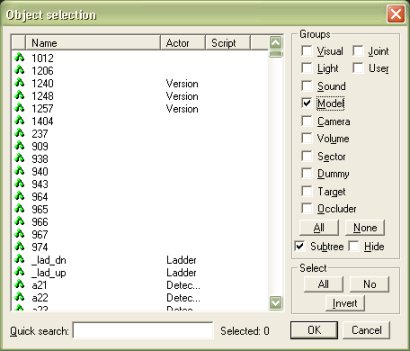
See where it says 'actor' on the menu? Click it and all the models will arrange to what actor setting the have. Scroll down until you find all the enemy actor models. Then select them all and press ok. Now press delete, yes delete. Now go to File > Save then press 'L' to reload the mission. Look at that, no more errors.
Press 'n' to bring up the object selection screen again. Arrange the actor models again then select all the detectors, press ok and delete them all. Now save and reload again.
Now to go on to part 2 of the tutoiral, click here
Written by Jason Batten