Your First Mission (part 3)
This is the third part of 'Your First Mission' make sure you have read the previous parts before you start.
Bring up the object selection screen by pressing 'n' then select only the 'light' group. Find the light '<default ambient>', select it then press ok. Now click on the properties box and select the light tab. Change the 'Power' to 0.4, only have light-map ticked then click the colour box. A screen will pop-up like the one below.
Change the colour numbers of red, green and blue to the ones I have shown in the picture to change the colour. Now select the light sectors tab and make sure the backdrop sector and the primary sector are ticked.
Bring up the object selection screen once again. Find the light '<default fog>', select it then press ok. Now click on the properties box and select the light tab. Where it says 'Range' put 0.3 for 'Near' and keep 'Far' as 0.0. Make sure under mode that vertex and light-map are ticked then make sure the light sectors backdrop and primary are ticked. Now click the colour box and change the colour to the settings I have below.
Create a new light by clicking Create > 3D Object > Light or by pressing Shift + L then name it '<vertex ambient>'. Now for the properties click the light tab, make sure the power is set to 1.0 and that the vertex and shadow cast modes are ticked. For light sectors make sure the primary sector is ticked. Now set the colour like I have below.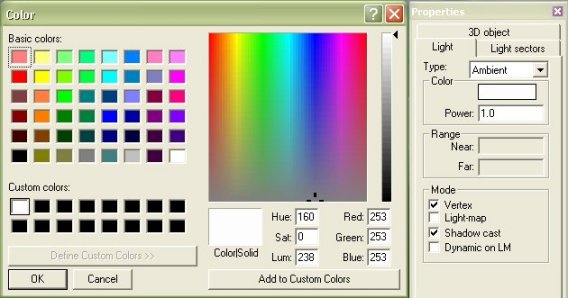
Open your object selection screen then find the light named 'shadow', select it and delete it. Now find the light named 'sun' and change the properties to the ones I have shown below. Note the primary light sectors should all be ticked.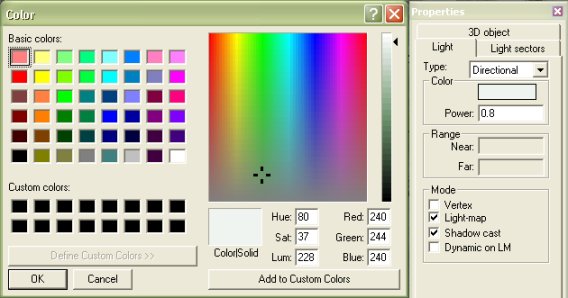
If you move around your map things should look a bit odd like below.
We have changed so much to do with the lighting we need to recalculate the light-maps. This is a simple thing to do but it takes a while. Go to Light-map on your main menu then click 'Deconstruct all'. Now your textures would have changed colour like below.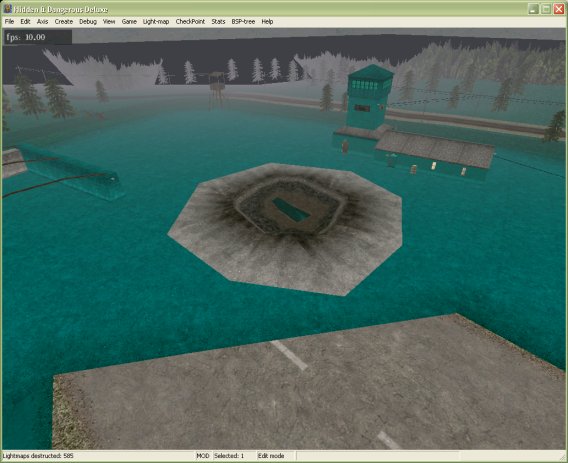
You will notice that some parts of the map seem to be a normal colour. If you click on the crater shown in the image below then click the visual tab on the properties box you will see it's type is 'Object'.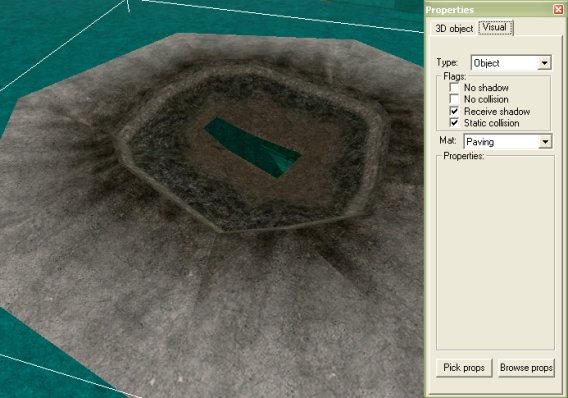
You must change it's type to Lit-object so that its colour changes blue/green like the rest of the textures. Now you must do this for the rest of the ground textures. Only do it for the run way, roads and other ground textures, do not touch the buildings. To speed up the process simple hold Ctrl and click multiple sections of the ground.
Once you have done that go to Light-map on your editor main menu then click Antialiasing > 1x1 (draft), now go to the Light-map menu again and click 'construct all'. There should be about 680 light maps being calculated, this will take some time even on draft so sit back and relax. Mine took 14 minutes, once yours is done save and continue.
Now to go on to part 4 of the tutorial, click here
Written by Jason Batten