Your first mission (part 6)
This is the sixth part of 'Your first mission' make sure you have read the previous parts before you start.
Now this is where things start to get more interesting. We are now going to place some enemies into the map. First go to the empty camouflaged runway hanger like below.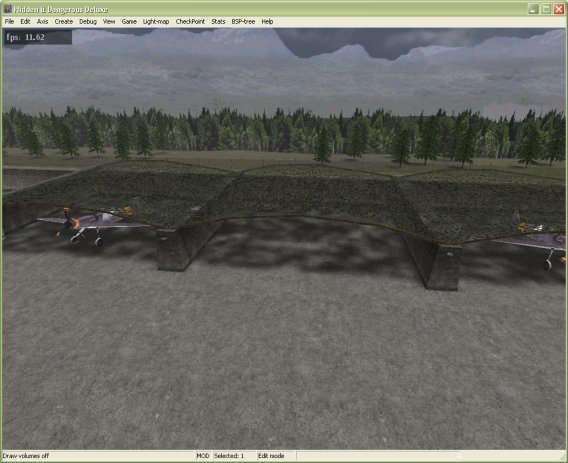
Press Shift + M to create a model and select the tiger tank it's named 'tiger.i3d'. Now press A to create an actor for the model, select 'AutoCannon' like below.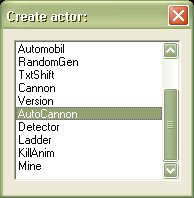
Place the tank in the center of the runway hanger. Go to View > Debug > Volumes, now you can see the tanks volumes which are used for collision. Right now the volumes are static collisions which means they aren't meant for moving objects, to change them to none static simply select the model and press Ctrl + V. You should see them change to red but for this mission the tank won't be moving so press Ctrl + V again to change them back to static collisions.
Since the cannon turret is the only thing that will be moving we must make it's collisions non static. To select a single collision press Shift + Ctrl + Alt then select the collision you want to edit. Now click the cannon collision then on the properties box select the volume tab and untick the 'static collision' box. Do the same for the turret base, look at the picture below for reference.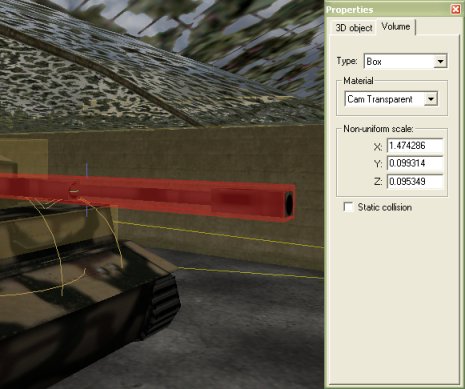
Now every time you create a static model or delete a static model you must build the BSP tree. The BSP tree holds all the volume information for collisions. To build the BSP tree simply go to BSP tree and click create of press Ctrl + B. You will see in the bottom left hand side of your editor some numbers rolling back, you have to wait until it says zero. Once it is done save and continue.
Select the tiger tank and on the properties box select model. Now where it says 'flags' make sure that 'No LM shadow' and 'Dynamic shadow' are unticked like below.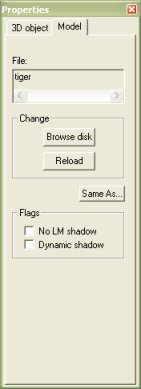
Since the model isn't going to be moving the shadow won't be moving so a dynamic shadow isn't needed. Now you have to click the ground deconstruct the light map and reconstruct it.
If you right click the tanks cannon you will see that on the properties box the tab changed from model to visual. This is the easiest way to select a model's visual's. If you click the visual tab you'll see that the type is 'Object' change it to 'Lit-object' and tick the receive shadow box like I have below.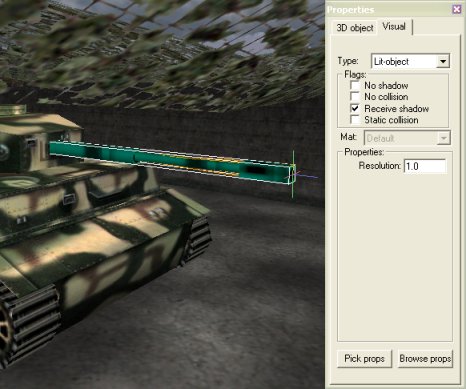
Now right click the turret, the body and the tracks then do the same as you done for the cannon. Now go up to Light-map > Select unconstructed then press Ctrl + F1 to construct the currently selected light-maps.
For this next part you will have to download this 1 KB file Tank Properties. Extract the file into your Hidden & Dangerous Deluxe directory. You should now have 3 files named automobil.tab, cannon.tab and version.tab.
It is now time to make the tank functional. Select the tank and press Ctrl + Enter. A box will pop up like below, select version and press enter.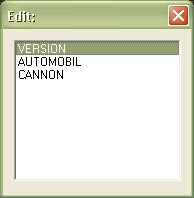
The version properties screen will pop up like the one below.
Generally you can copy the settings of vehicles used in the official game missions but you can also import settings with the click of a button. Click the import button on the bottom of the version properties screen. A browser window will pop up, so now it is time to find the 'version.tab' file you downloaded and extracted before. Just open it when you find it and it should apply the settings. Now repeat the same steps for the 'automobil' and 'cannon' properties, it is easy. Please note that you do not need to include the .tab files in your addon.
Select the tank press Ctrl + Enter then select 'Automobil', if you imported the properties correctly it should say '100.0' for fuel. Change the fuel to '0.0' so the tank can not be used by anyone.
You may will get an error like below saying "Actor tiger00 (AutoCannon): Visual 'tiger00.pasy' is not UV-shift object" but this is easily fixed.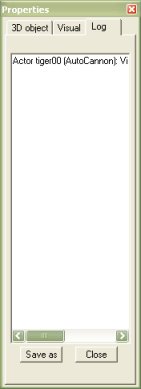
Simply select your tank and bring up the automobil properties screen then open up the menu tree like below.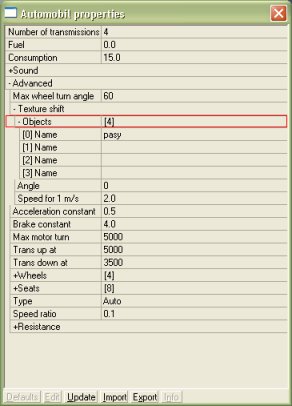
Under the 'Object' menu tree delete the 'pasy' text. Now you can save, reload the mission and the error will be gone. Congratulations on your first error fix.
Now you have to create a cannon operator. Press Shift + M then find 'german3.i3d' just press enter when it asks to name the model the default name for models is always best. Go to View > Debug > Volumes to show the collisions of the German soldier then press D to show the dummies for the tank. Select the German soldier and press Ctrl + V to change it's collisions. Press A to select an actor for the soldier, select enemy. On the properties box select the model tab then tick 'No LM shadow' and 'Dynamic shadow'. Now move your soldier to the dummy on the left side of the tank like below.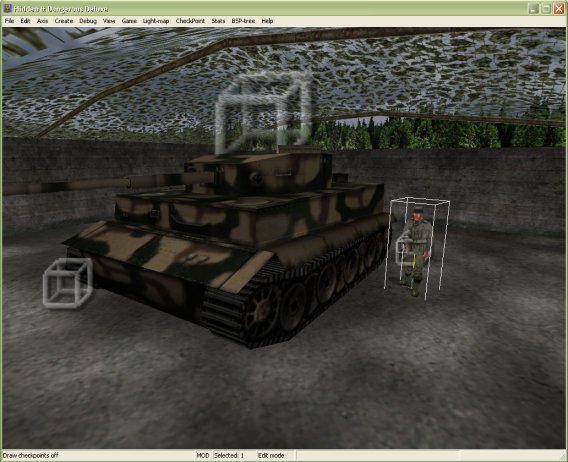
With the soldier selected press Ctrl + Enter to bring up the 'human properties' screen. Setup things like I have below then I will take you through what we have done.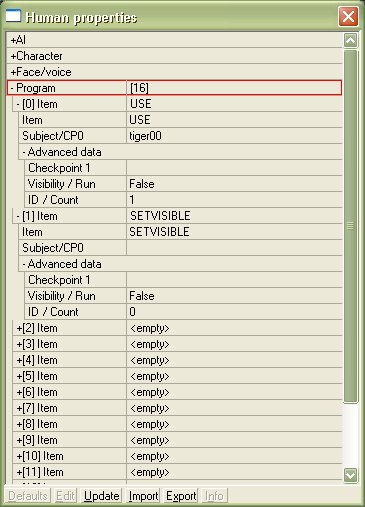
Programming is generally easy to do if you look at the first item we programmed I told the soldier to 'USE' the 'tiger00' and set the advanced data id/count to 1. Now this means I told it to use the tank and to sit in the cannon position. You see the soldier would sit in position 0 which is the drives seat unless I set it 1 which is the cannon position. You can find out the seat positions by looking at the automobil properties of the tank. Now the second item we programmed was 'SETVISIBLE' with the advanced data visibility set to false. This means I set the soldier visibility to be invisible, so you can't see him. Why? well when a tank get destroyed the soldiers in side the tank will fall out and be visible, so to make things more realistic we must set the soldiers that use the tank to be invisible.
This was all hard work congratulations for completing part 6 but there is still a few more things we must do before you have a level of your own.
Now to go on to part 7 of the tutorial, click here
Written by Jason Batten