Your first mission (part 8)
This is the eighth part of 'Your first mission' make sure you have read the previous parts before you start.
Take your camera to the first enemy housing building then turn on dummies by pressing D and turn on checkpoints by pressing Ctrl + Shift + K. Look at the picture below.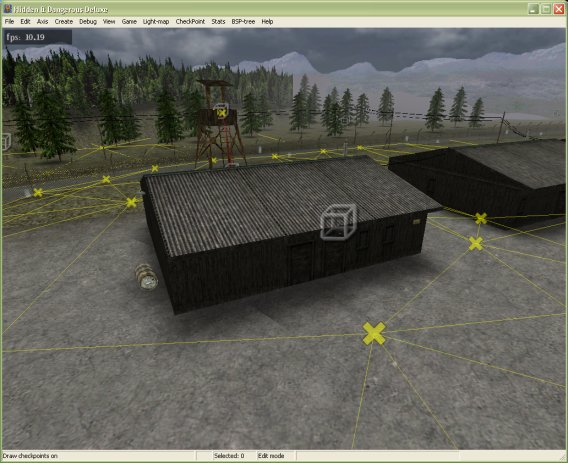
Use the german1.i3d model to create an enemy soldier and place him by the door of the first building. Don't forget to change his collisions to non static. Now give him an MP40 machine gun and some grenades like we done in the previous part.
Now I want you to setup your enemy soldiers programming like I have below.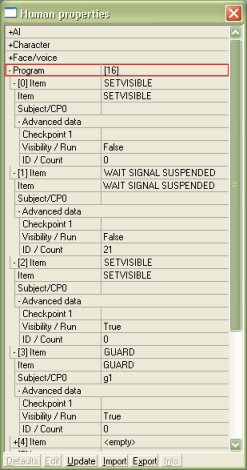
Ok let me explain what you just done.
As we have learnt before SETVISIBLE with it's visibility set to false will make the enemy invisible. WAIT SIGNAL SUSPENDED means your soldier must stay like he is until he receives a signal, in this case the ID/Count is 21. We'll get to who or what sent that signal in a moment. Now once that signal has been received the SETVISIBLE has been set to true so now the enemy is visible. Finally we tell the enemy soldier to GUARD the Subject/CP0 named g1 and his Visibility/Run status is set to true. This means that the enemy soldier will run to that subject or checkpoint.
We just told the enemy to wait for a signal from 21 and to run to g1. If you click the dummy in front of the house and press Ctrl + Enter to bring up it's properties then open up the menu tree for 'Detect what' you'll have what's below.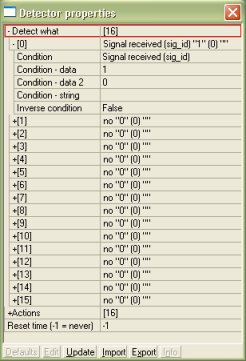
Signal received means the detector is waiting for a signal to be received, in this case the signal is 1. Now what is sending this signal of 1, if you close to detector properties for a moment and turn the camera around you should see a few dummies. Click one like I have below.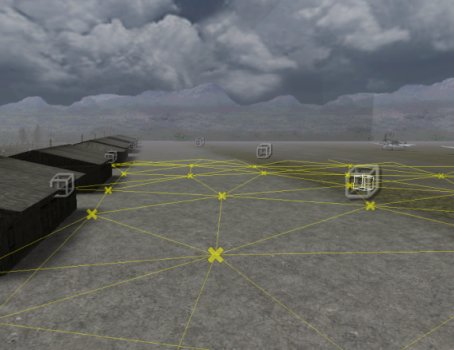
Bring up its properties then see what it is detecting. This is a sound detector, like in the original mission when you fired the alarm would go off and enemy soldiers would come running out of the buildings. Close the detects what menu tree then open up the 'Actions' menu tree. It sends a signal data number of 1, so when you fire this detector sends a signal of 1.
Turn the camera back to facing the building and select the detector in front of it again. Now we know where that signal 1 is coming from. Bring up the properties of the detector in front of the building again. Open up the 'Actions' menu tree like below.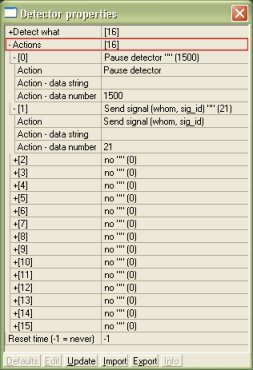
Look at that, this detector sends a signal of 21, which means this detector tells our enemy soldier when to become visible. But before it sends the signal it pauses the detector and tells it to wait 1500. Every 1000 means one second, so the detector waits 1.5 seconds before sending the signal to our guard. This is because when the alarm goes off enemy soldiers realistically wouldn't immediately come out of the building. In real life it would take a second or more for the soldiers to get their weapons or even wake up. Even 1.5 seconds is too short so let's change it to 2500 which is 2.5 seconds.
It took a bit but I finally told you who sent the signal of 21 to your enemy soldier. I wanted to teach you more about detectors and signals so I told you where everything came from as well. Now if you bring up your enemy soldiers properties then look at the programming we tell the soldier to go to the checkpoint g1 but there is no g1 so lets make it.
Move your camera up in the air about 10 metres then go to CheckPoint > Create or simply press Shift + K to create a checkpoint. Change it to a user checkpoint which is green by going to CheckPoint > Set Type. Now go to CheckPoint > Rename and name it g1 then place the checkpoint where ever you want the enemy soldier to run to when the siren goes off. I placed my next to the run way if you look below.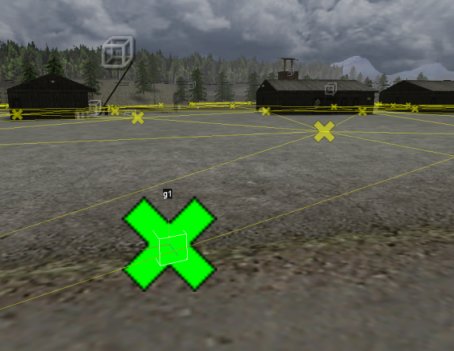
Now you can make as many enemies appear when the siren goes off as you like.
Now to go on to part 9 of the tutorial, click here
Written by Jason Batten