Your first mission (part 9)
This is the ninth part of 'Your first mission' make sure you have read the previous parts before you start.
It's time to do some more work with detectors. Take your camera to the plane in the picture below and select the dummy named 'md1'.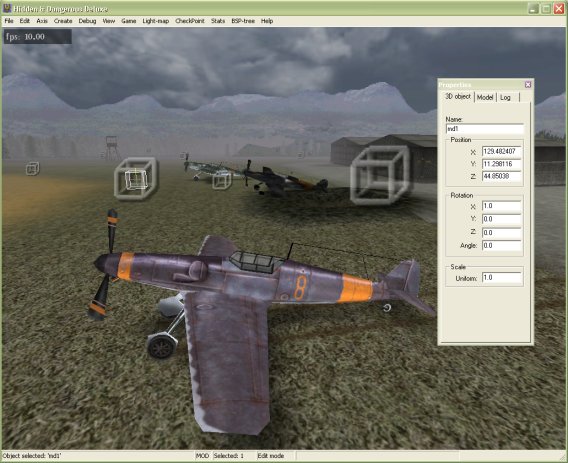
If you open up the detectors properties you will see that under the detect what menu tree it is waiting for the Actor 'm1' to be destroyed. The plane in front of you is the actor m1.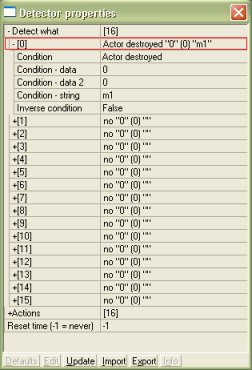
If you open up the actions menu tree you will see it sends the signal data number 12 once the plane has been destroyed.
Click the detector named 'mefinal' to the right like below and open up its properties.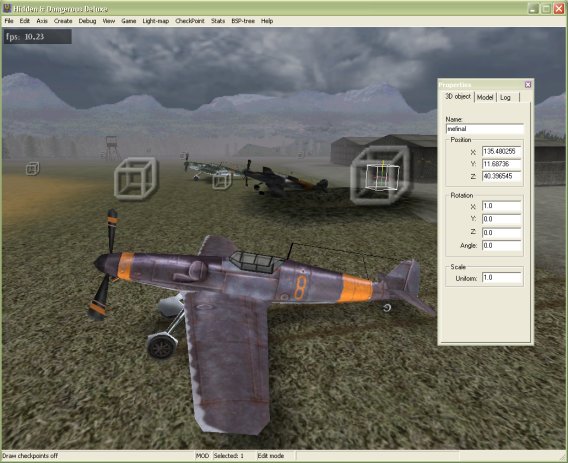
Under the detect what menu tree you will see seven signal received items all with the data number of 12. These are for all the planes, every time one is destroyed it sends the signal 12. Now if you open up the actions menu tree you will see once the detector receives the signal that each and every plane has been destroyed it will play the sound cms001.wav from the clips folder. The file name should end in .ogg instead of .wav so change it now. After that it sends a signal data number of 13, we'll find out where that goes in a minute. But since all the planes are destroyed that means you have completed an objective so it looks to display the objective text data number 751 which is an official mission objective. You want to put your own objective text data number in there. If you remember at the start of the tutorial in part 1 you created a addon.txt, in it are your objectives. Look below for reference.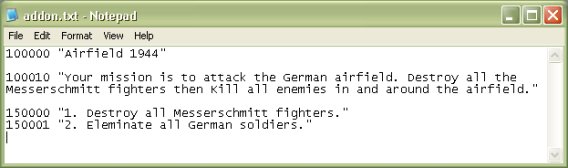
The objective text data number you want is '150000' which is for the objective "Destroy all Messerschmitt fighters.", so replace the number 751 with 150000.
Now to find out where the signal 13 is sent to. Well at the moment it isn't sent any where. We need to create a detector for it, so create a model by pressing Ctrl + M then search for the model 'null.i3d'. Name it mission completed then press A to give it an actor and select 'Detector'. Now bring up its properties box then enter signal received with the condition data to be 13 like I have below.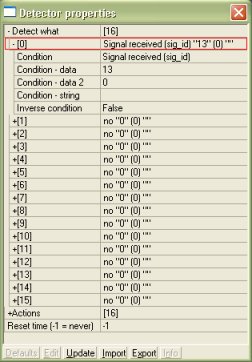
Now fill out the action properties like I have below.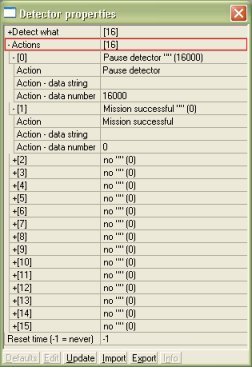
The pause in the detector is so the music can finish playing from when the objectives are completed. When the objectives are completed they will send signals to this detector. When they are both received the mission will be successful.
The second objective is to eliminate all enemy soldiers so lets set up a detector for that. Create a null.i3d model then name it all dead and give it a detector actor. Bring up the detectors properties and for detect what select 'All enemies dead' like I have below.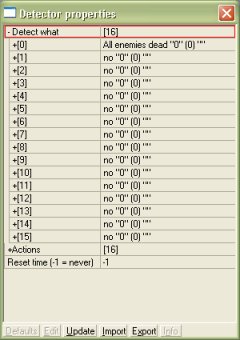
Now for actions fill in what I have below.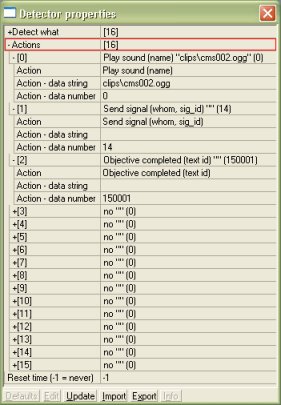
Now when the objective is complete it will play the cms002.ogg sound, send a signal data number of 14 and display the objective text data number of 150001, which is in your addon.txt.
But we have to edit the mission completed detector to receive the signal of 14 now. So do that now as I have below.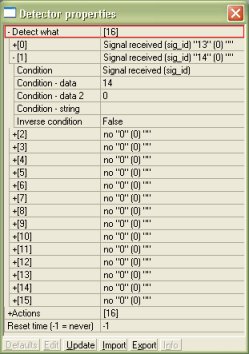
Congratulations you have completed your first mission. All you really have to do now is fill it full of more enemies. It's just a matter of repeating what I showed you in the tutorial with enemies appearing and patrolling.
The next part is the final part where I show you how to pack up your level ready to play, send to friends and submit to my site ;)
Now to go on to part 10 of the tutorial, click here
Written by Jason Batten