Introduction to the editor (part 1)
In this tutorial I will introduce you to the Insanity Editor
Go to your Hidden and Dangerous directory and open the 'bin' folder then start the editor by double clicking the 'hdedit.exe' file. The editor will auto-matically pop up in the resolution you have the game set in. To change this go to View > Screen and change it to any resolution that suits your screen size. I have mine set to 800x600. You can also grab the bottom right corner and re-size it to any size you wish.
Your editor should look like the picture below.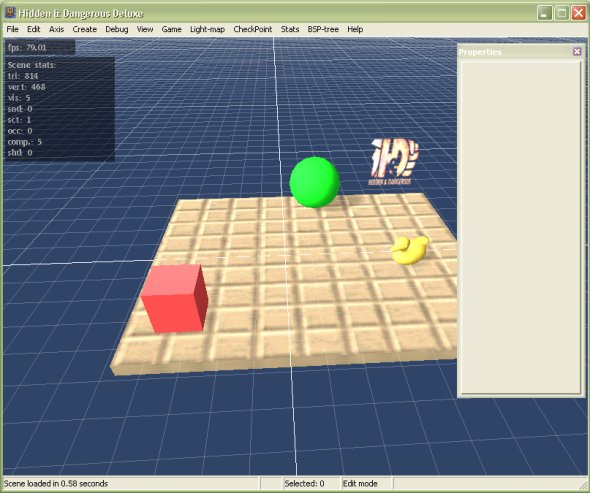
If your editor does not have the properties box showing just go up to Edit > Properties or press Alt + Enter to bring it up on screen. Once you have done that you can simply click it and move it any where you want.
If you have done what you needed to do in the 'Setting up directories' tutorial you should have exported all the levels. If you have not exported all the game levels or did not read 'Setting up directories' do it now.
First thing I want you to do is to go to the 'missions' folder under your Hidden and Dangerous Deluxe directory. Find the folder named 'Italy1' open it and copy the 'game' directory. Make sure you have created a mission directory like I taught you in the 'Setting up directories' tutorial. If you have not do it now then paste the game folder in your mission directory replacing the folder you created.
Now go to File > Open Mission or just press O for short. You should get something like the screenshot below.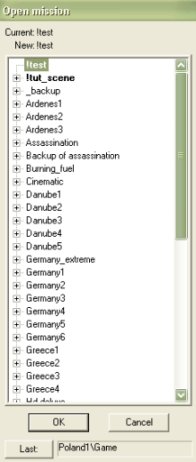
Some of the level in the list you won't have because they are the ones I am currently working on but you should have most.
Scroll down the list of missions until you find the name of the folder you created before then open up the tree menu, select 'Game' and press ok. You should now have whats on the screenshot below.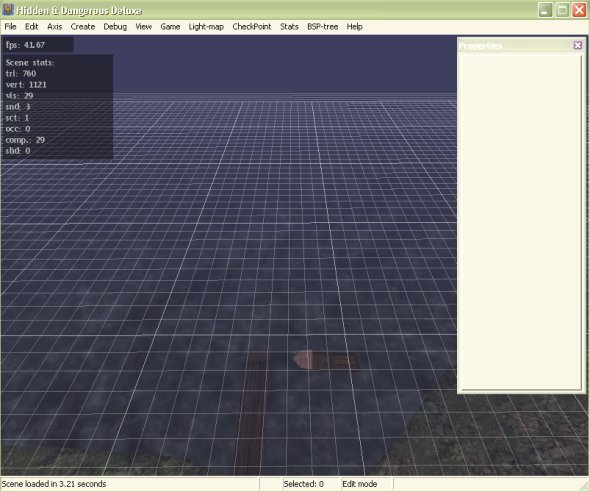
You have just opened the first mission you play in the game. If you look at the status-bar on the bottom of the editor you'll see 'Edit Mode' this means you are of course in edit mode. Press the spacebar to change to 'View Mode', you'll see the status-bar change like below.
Now that you are in view mode you'll be able to move around the level using your mouse. Left-mouse button moves the camera forward and right-mouse button moves the camera backwards, test it out now. The numbers 1 to 9 increase and decrease the camera speed. The slowest speed is 1 and 9 is the fastest, you can also press 0 which is extremely fast. When you change speed the status-bar will also change if you change the speed to number 7 your status-bar should look like the one below.
Everytime you change the speed the status-bar will change too.
If you are moving around the level in view mode and your camera feels like it hit a boundry or something visible this mean you infact have. Go to View > Debug > Volumes your editor should look like the screenshot below.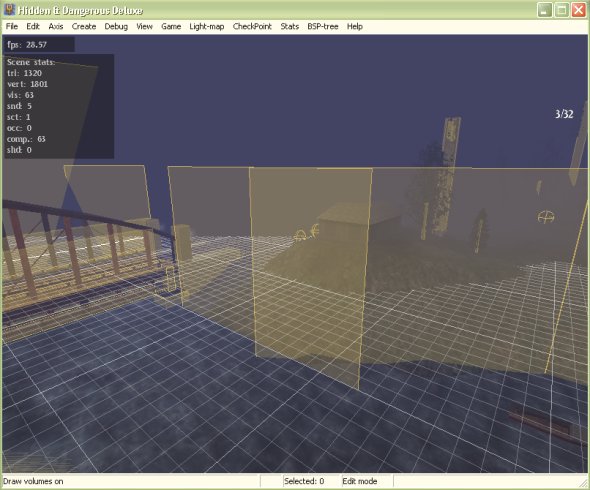
What are all those orange things you might be asking. Well they are volumes which are used to make collisions. Don't worry too much if your confused. Collisions are exactly what they sound like. They are the things stopping you from walking through objects and falling through the floor. If you move around the level you'll see red volumes on enemies and your own soldiers like in the screenshot below.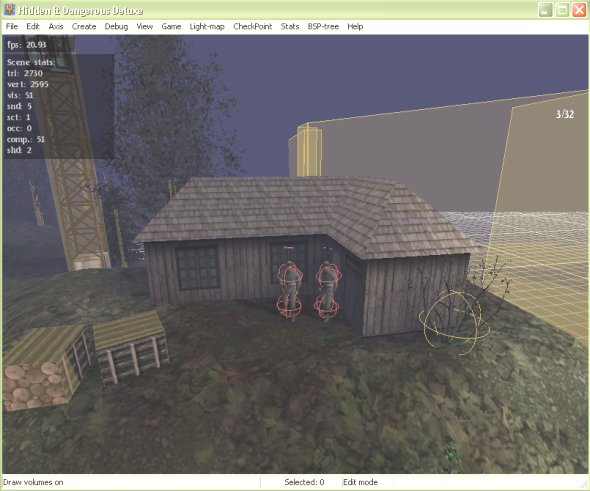
Hard to see in the screenshot above but you get the idea. These are moving volumes or moving collisions. They are used on characters and vechiles because they are moving objects. All other objects and models use non-moving volumes or collisions also known as static-collisions. Don't stress I'll teach you more about volumes and collisions later.
Notice when you move around the editor in view mode you bang into everything. You can change it so the editor ignores collisions so you can move through everything which comes in handy. Just go to Edit > Collisions or press Shift + F7. If you look at your status-bar it will say collisions on or off. The status-bar tell you the last thing you have done in the editor it's very handy. Now with collisions off you can move through everything. You can turn off volumes if you like by going to View > Debug > Volumes.
You might notice that the level is a little dark which makes it hard to see and in turn hard to edit. That's why the great programmers made a helper light which focuses over the camera. Go to Debug > Helping Light or simply press F10 to turn on the helper light. Your screen should light up like below.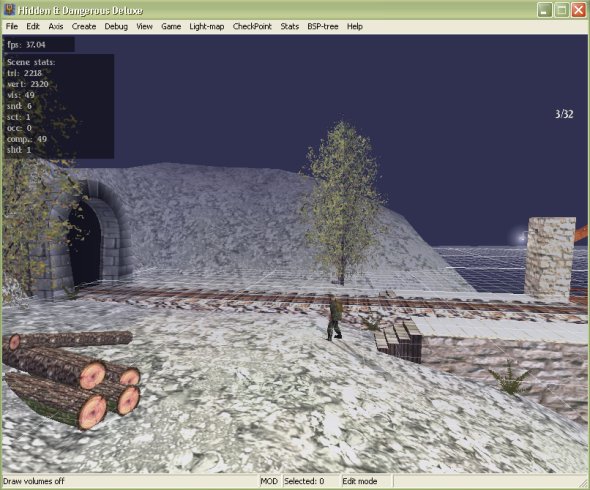
The next thing we will look at is checkpoints. Go to Checkpoint > Show, this will bring up all the checkpoints. Your editor should look like the screenshot below.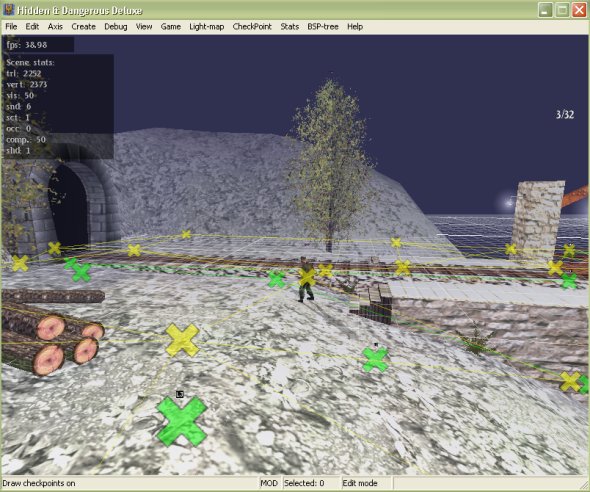
The yellow checkpoints are AI navigation points. These tell the computer AI where it can go on the level. The green checkpoints are AI destination points. These are used to tell the AI where to patrol and where to go if they are triggered to run to a certain spot. There are also red checkpoints which are used for vechile navigation. I'll teach you more about checkpoints later on. This was just to introduce you to them.
Now to go on to part 2 of the tutoiral, click here
Written by Jason Batten