Introduction to the editor (part 2)
This is the second part of 'Introduction to the editor' make sure you have read the first part before you continue. Click here to read the first part.
Now things start to get more fun. To place a model into a scene go to Create > 3D Object > Model or press Shift + M and a selection box will pop up like below.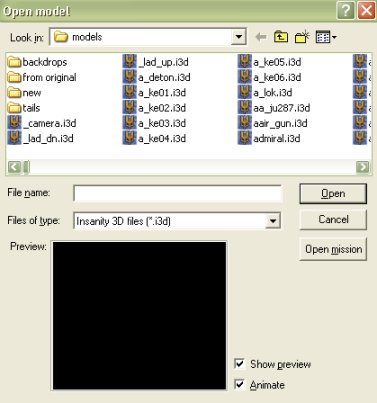
If you have extracted all the models like you were told to in the 'Setting up directories' tutorial you'll be able to see all the game models. If you have select the model named 'german1.i3d' and press ok. A little box with 'Enter name' on it will pop up like below.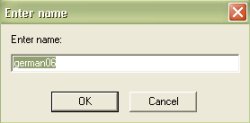
You can name the model anything you want but its best to keep the default name unless your re-naming it for a reason. In other words just press ok. Now move the camera back and look at your model, it should look like below.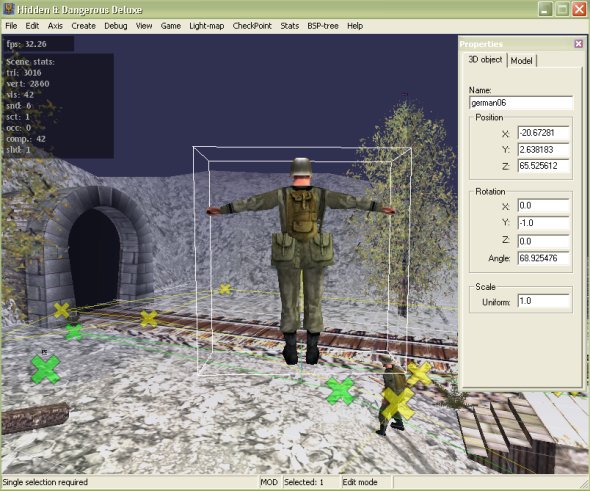
It doesn't look the other eneimes on the level does it. That's because you haven't set its actor. To set an actor make sure your model is selected then go to Game > Create Actor or simply press A. Now you have done that a box like below should pop up.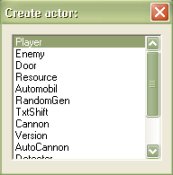
It should be pretty obvious which one you choose but just to make sure select 'Enemy' and press enter. Once you have done that your model will change like the screenshot below.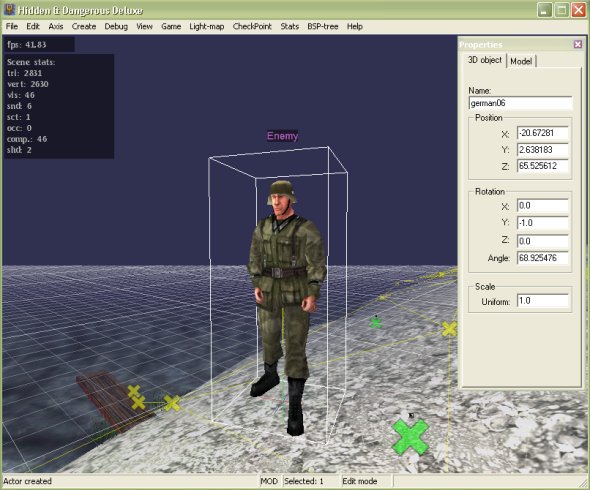
As you may have noticed the actor is not on the ground to puthim on the ground go to Edit > Gravitation > Fall Down or press Ctrl + G and he should drop to the ground.
Go to View > Debug > Volumes and turn back on volumes if you turned them off before. You'll see the actor you just made has orange volumes. Select your actor then go to BSP-tree > Toggle Selection Static or press Ctrl + V and your volumes should now be red like the other eneimes in the scene.
Now that your actor is ready it's time to move him. To be able to move anything in the scene you must be in 'edit mode' so make sure your in edit mode. Select your actor then hold 'Alt' and move the mouse back and forward to move the actor up and down. Changing the camera speed by using the numbers 1 through 9 will also change the speed you move objects in the scene. Try it now by changing the speed and seeing how slow or fast the object moves up and down. Press Ctrl + G to get him back on the ground. Now hold down 'Shift' and move the mouse in any direction you want to move the actor in the same direction in the scene. Changing the speed also effects this functions movement speed. I suggest you change the speed to number 5 when moving objects, it's a good steady speed but it's up to you. Now hold 'Shift' + 'Alt' at the same time then move the mouse left or right to rotate the object. Changing the speed does not effect this function. Play around with these movement functions until you get use to them. Remember you have to be in edit mode to move objects.
Now that your a pro at moving objects it's time to move your actor somewhere and give him something to do. Move your actor on to the bridge like I have done in the screenshot below.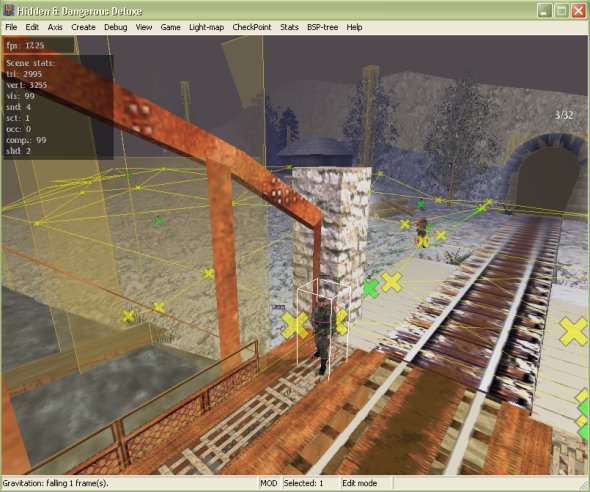
That wasn't hard at all was it. Editing for H&D Dleuxe is not only easy, It's fun!
Now to go on to part 3 of the tutorial, Click here
Written by Jason Batten